WpW: Optimizing Images with LSCache
Welcome to another installment of WordPress Wednesday!
Disclaimer: The information contained in this post is accurate for LSCWP v1.6.2.1 [release log]. If you are using a newer version of the plugin, some details may have changed. Please refer to our wiki for the latest!
Have you ever wished that your site’s images didn’t take so long to transfer? Well, there may be something you can do about it. Many images can be optimized to take up less space, which in turn takes less time to transfer. Two and a half weeks ago, we introduced an Image Optimization feature, and in that time, we’ve already optimized around 640,000 images. That’s a lot of saved bytes!
Intrigued? Today we’re going to talk a little bit about Image Optimization: what it is, and how to use it.
Image Optimization
One effective way to deal with the cost of transmitting images over the Internet is to reduce the size of those images.
Smaller images = faster transmissions.
The LiteSpeed Cache plugin provides access to image optimization services on a central web server. Here’s how it works:
- You press the Send Optimization Request button on the Image Optimization page.
- The central server denies or accepts the request after callback verification.
- The central server distributes the task to a child server.
- The child server fetches your images.
- The child server processes your images.
- The child server notifies WordPress that the images are ready.
- A cron job runs and pulls your images back into WordPress.

You may be wondering about step 5. What is actually happening when the child server processes your images?
Well, there are libraries for this sort of thing, so we don’t need to reinvent the wheel. We use Imagick functions to adjust your images to 85%-90% quality of the original. (This optimization is lossy.)
During the process, three versions of each image file are generated:
yourimage.bk.jpg: the original version of your image.yourimage.jpg: the optimized version of your image, which is what will be shown on your site from now on.yourimage.jpg.webp: is a version of your image saved in a format that is about 25%-34% smaller than JPG (learn more).
If yourimage.jpg was unable to be optimized for any reason (maybe it was already optimal) there will be no new version generated, and therefore no yourimage.bk.jpg. There will be a WebP format saved, though.
Using multiple plugins
Before we go any further, it’s important to point out that you should not use more than one Image Optimization plugin at the same time! Doing so can cause quirky behavior, and it often leads to errors in processing: errors that can only be cleared by creating a ticket and having us deal with it on our end.
It’s extra hassle for everyone involved, so please just don’t do it 🙂
Generally speaking, it’s never a good idea to have two plugins performing the same optimization functions anyway. To be clear, you can still use multiple optimization plugins, as long as you don’t duplicate any of the individual functions. I go into more detail on that here, if you want to know more.
How do I use Image Optimization on my WordPress Site?
Settings
From the WordPress Dashboard, navigate to LiteSpeed Cache > Settings > Media. Scroll down, and you will see two settings related to optimization.
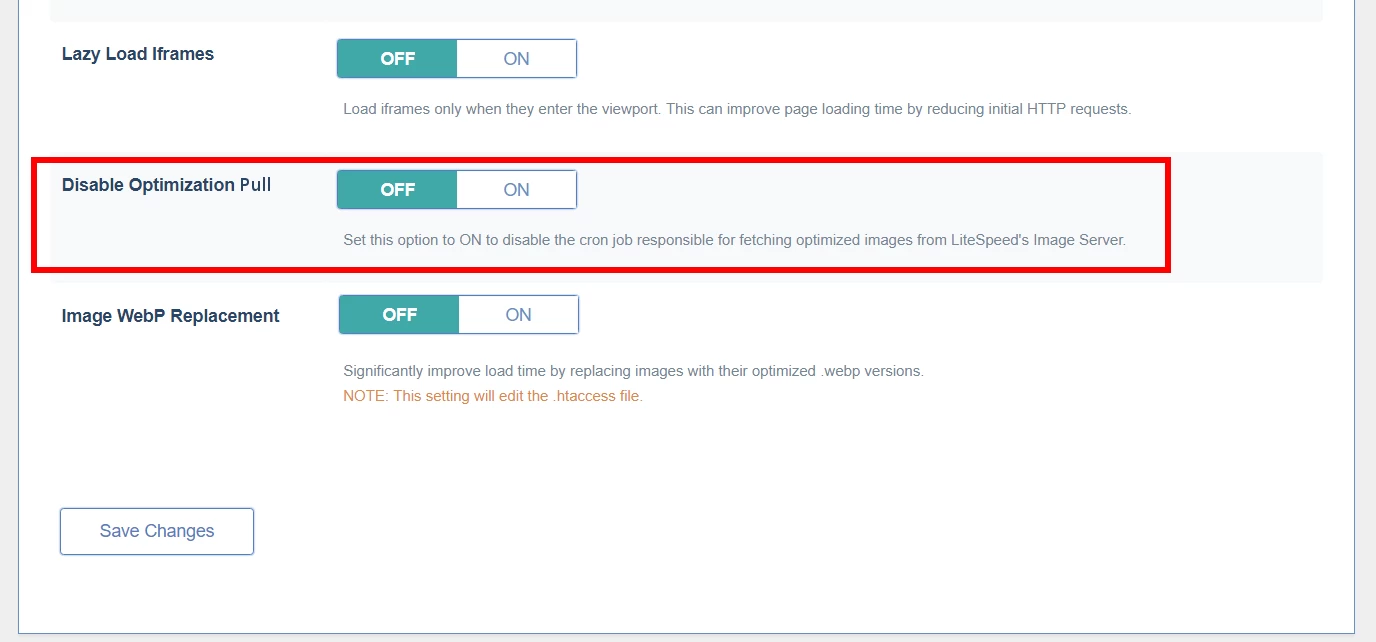
Disable Optimization Pull, when ‘ON’, will disable the cron job that is used to pull optimized images from the central server into your WordPress media library. If you turn this on, you will be unable to retrieve your optimized images.
Under normal circumstances, you will not need to touch this setting.
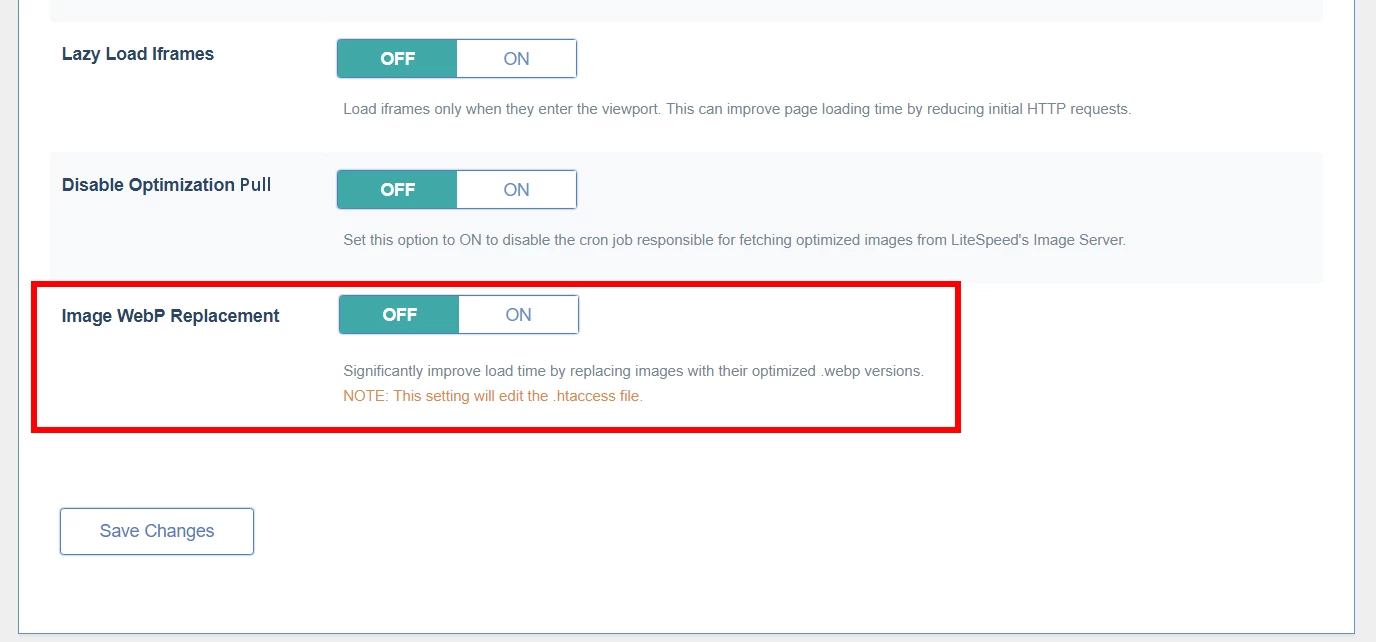
Remember the .webp file format we mentioned earlier? If you would like to use WebP images in place of all of your JPGs and PNGs, turn the Image WebP Replacement option on.
Not all browsers support WebP, so there will be two versions of your pages in cache: one with the WebP images and one with the other image formats, and the appropriate version will be served to your visitors. And since your other optimized image formats are still there, you can turn WebP off at any time, if you change your mind.
Optimize
Navigate to LiteSpeed Cache > Image Optimization.
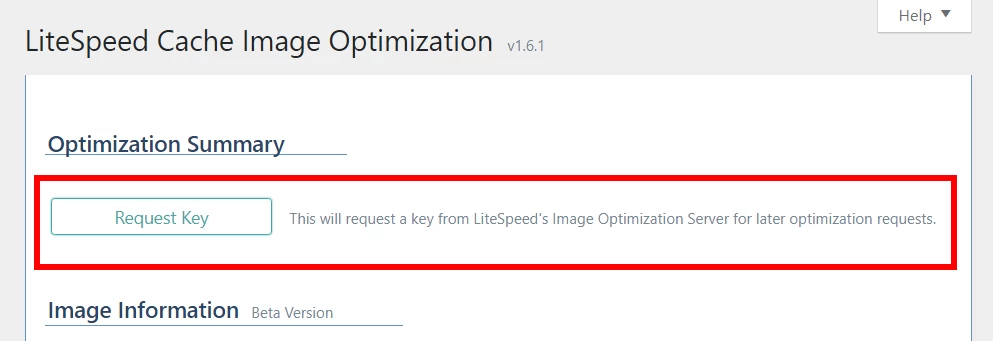
The first time you visit this page, you will see a button that reads Request Key. Press the button to obtain a key from the central server that it will use to process all of your future image optimization requests. Once the key is obtained, your screen should look like the one shown below, and your API key will be listed (although most of it will be blocked out for security purposes).
Below the key is Total Reduction. It shows you how much space the server has saved with image optimization to date. This number isn’t updated automatically, so to get the most recent status you will need to press the Update Reduction Status button.
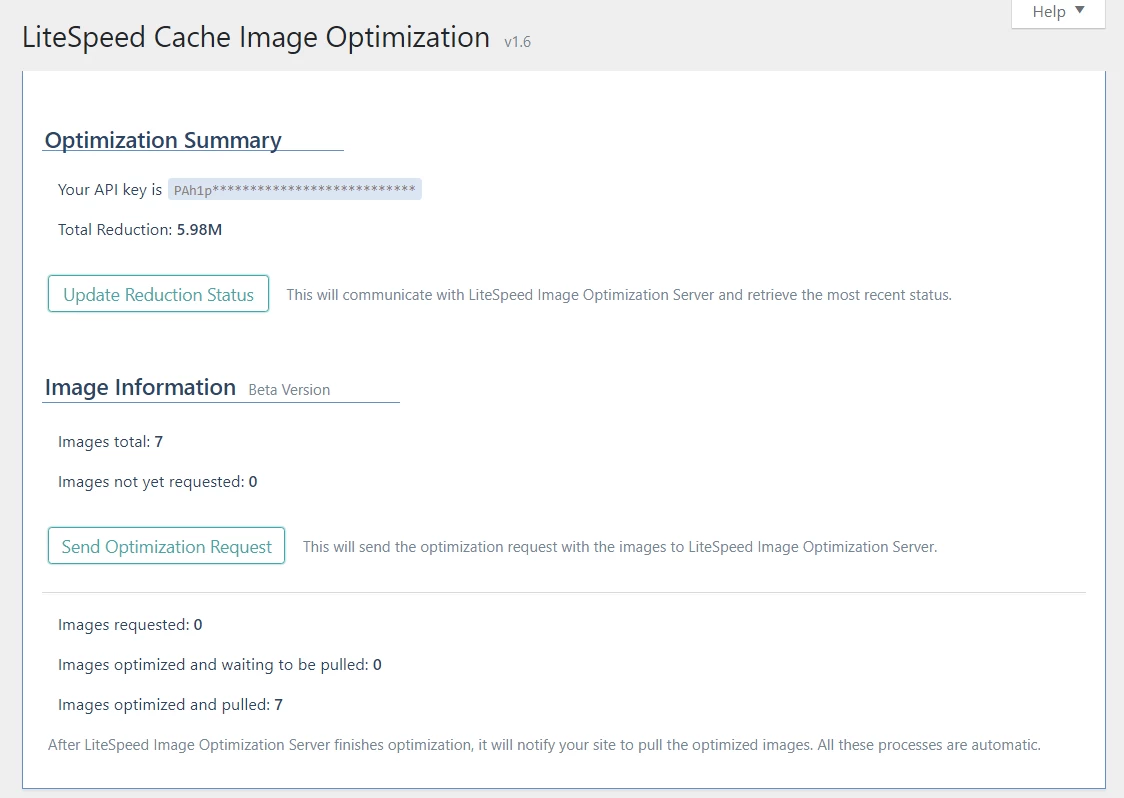
Below Optimization Summary, you’ll see Image Information.
The top section of Image Information is where you submit your request.
- Images Total displays the number of images present on your site.
- Images Not Yet Requested shows the number of images yet to be optimized.
- Press Send Optimization Request and all of the unoptimized will be submitted to the central server for optimization.
The bottom area of this section shows you what’s happening with your current request.
- Images requested: how many images are waiting their turn to be optimized
- Images optimized and waiting to be pulled: how many are complete and waiting to be pulled back into WordPress
- Images optimized and pulled: how many have finished the process completely
All of this happens behind the scenes after you’ve pressed the Send Optimization Request button. You can refresh the page to update these numbers, and you can leave the page while optimization is running, if you’ve got other things to do.
Restore
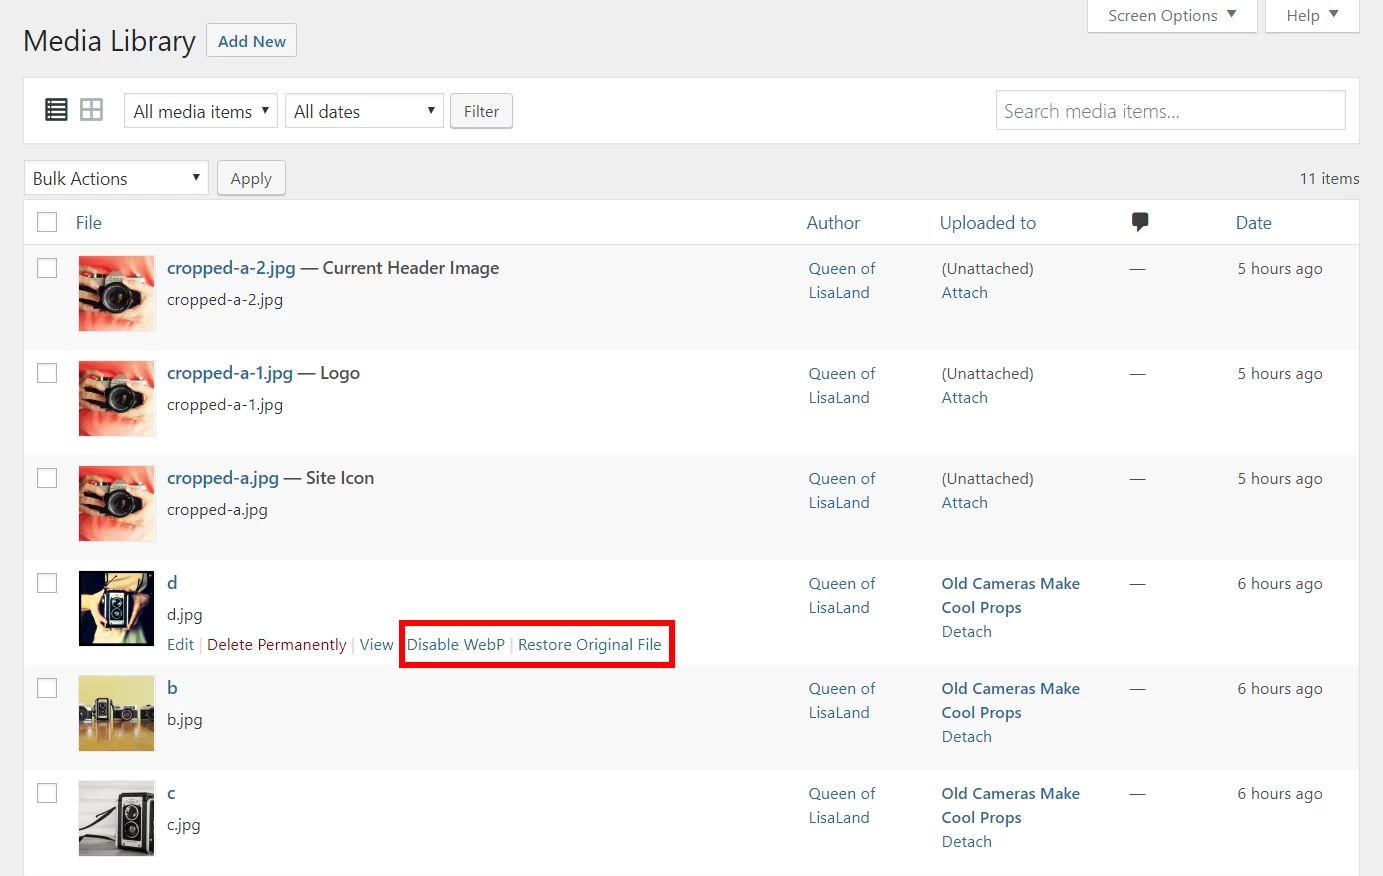
If you are unhappy with the way an image was optimized, you have the ability to restore it back to the original version. From the WordPress Dashboard, navigate to Media > Library, choose the list view, and hover over the image you’d like to revert.
Click Restore Original File and everything goes back to normal.
If you have enabled WebP images globally, you can disable it for individual images using the Disable WebP link.
Comparing Pages With and Without Optimization
I created a few image-heavy blog posts, using differently-sized images for each.
With no optimization whatsoever, my post with the largest images in it had to transfer 14,070,859 bytes of imagery. After optimization, it was 9,467,154 bytes. Nice! And when I enabled WebPs, it was even better at 7,249,465 bytes! Image optimization cut the image size nearly in half.
Your mileage will vary based on how optimized your images already are when they’re uploaded. If you’re a photographer, and you take pains to export your images from Lightroom or Photoshop already nicely-optimized, you will see much less of an improvement (if any) than someone who doesn’t pay too much attention to their imagery before upload.
I saw this in action on a post where the imagery transfer took 353,370 bytes before and after optimization. My images were clearly already optimized. However, when I enabled WebP, it went down to 250,520 bytes. So at the very least, you should be able to see some improvement by enabling WebP.
Image Optimization has been a popular topic on our WordPress forum lately, and there have been a lot of questions about what, exactly, it is doing to your photos. I hope that this has lifted some of the mystery. And if you still have questions, please do ask!
—
Have some of your own ideas for future WordPress Wednesday topics? Leave us a comment!
Don’t forget to meet us back here next week for the next installment. In the meantime, here are a few other things you can do:
- Subscribe to the WordPress Wednesday RSS feed
- Download LiteSpeed Cache for WordPress plugin
- Learn more about the plugin on our website
Comments