JT: The Beginner’s Guide to LSCache for Joomla
Welcome to the first installment of LiteSpeed’s Joomla Tips!
Today we are sharing a Beginner’s Guide to LiteSpeed Cache for Joomla!
If your Joomla site is powered by LiteSpeed Web Server, you have a very powerful new tool at your disposal: the LiteSpeed Cache plugin for Joomla. LSCache is a high-performance, open source, user friendly cache plugin, and you don’t have to be a site optimization expert to use it.
How it Works
Joomla sites consist of dynamic pages that are built with PHP. The pages of a Joomla site don’t exist anywhere in the file system; they are constructed on demand through PHP, and then served to the visitor as HTML. This can be a resource-heavy process, and the LiteSpeed Cache for Joomla plugin is one way of dealing with it.
When Joomla dynamically generates the static HTML page, LSCache communicates with LiteSpeed Web Server to store a copy of it. Once the static copy exists in the cache, then that copy can be served to future visitors, eliminating the expensive Joomla PHP process for all but the first visitor to request the page.
When your site is cached, it requires much less involvement from the Joomla backend, which translates into a faster site and a better experience for your site’s visitors.
Enable the Plugin
We’re going to assume you (or your hosting provider) have already installed the plugin and configured LSCache at the server or virtual host level. If you need instructions for that, you can see our wiki. Don’t forget to deactivate all other full-page cache plugins, including “System – Page Cache” and “JotCache,” as well.
NOTE: You can still use other types of cache (like object cache), but only one page cache can be used at a time, so you’ll need to disable the others, if you want to use LSCache.
From your Joomla Administrator menu, navigate to Extensions > Plugins. If you have a lot of plugins listed, type LiteSpeed into the search box to bring up the LiteSpeed Cache Plugin.
Look for the green check mark next to the plugin name. This indicates that the plugin is installed and enabled. If you see a red X instead, click the red X to enable the plugin. Once you’ve done that, the green check mark should appear, and you are good to go.
Configure the Plugin
LiteSpeed Cache works with most Joomla setups right out of the box. “Out of the box,” of course, is a figure of speech. Software rarely comes in a box anymore, which is great for the environment, but maybe not so great for your cat, who just loves cardboard boxes…
The point, of course, is that LSCache for Joomla usually just works. It can often be enabled and ignored. There’s usually no need to play around with the settings, unless your site has atypical needs.
Just the same, let’s go over some of those settings, so that you can use them if you want to.
Navigate to System > Global Configuration > LiteSpeed Cache to access the plugin’s settings. The first tab is for Basic settings.
The Basic Tab
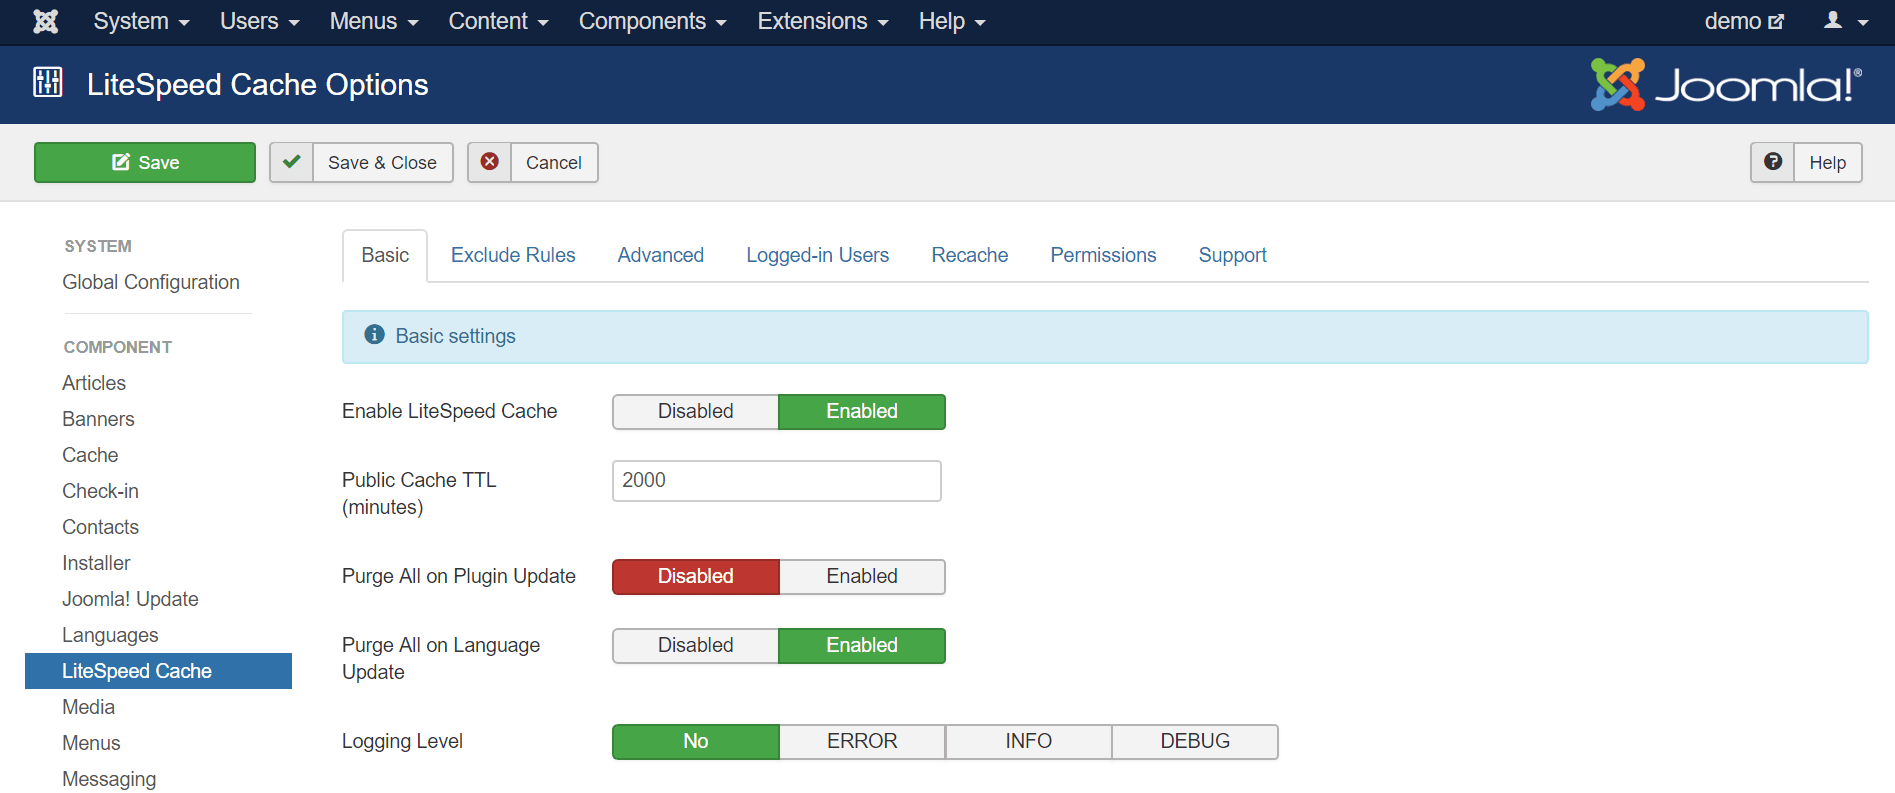
Here is where you enable or disable the caching functionality of the plugin (not to be confused with enabling the plugin itself, which we did earlier), and set a few parameters for the way it should behave.
Enable LiteSpeed Cache
By default, caching is already enabled once you install and enable the plugin. If you need to stop caching your site for whatever reason, you can press Disable to turn it off. Simply press Enable to get it back up and running again.
Public Cache TTL
“TTL” stands for Time to Live, and it refers to the length of time a web page is valid within the cache. The default is 2000 minutes, but if you have a site that updates frequently, you might want to make that number smaller. Similarly, if you have a site that is fairly static and rarely changes, you can make that number much larger.
Note: LSCache’s “smart purge” technology allows you to confidently set a high TTL, knowing that if content changes during that time, the cache will automatically be purged for any pages that are relevant to that change. We’ll explore that concept in more detail in a future Joomla Tips article.
Purge All on Plugin Update
If you are concerned that plugin updates are going to change some of the pages of your site (thereby causing the cached copies to become outdated), then you should enable this setting. It’s disabled by default, because usually plugin updates have minimal effect (if any) on the displayed content.
Purge All on Language Update
This is similar to the previous setting, except it refers to language updates, and it is enabled by default.
Logging Level
You can leave logging off in most cases. It’s handy to turn on logging when you are trying to diagnose a problem. If you’ve contacted our support team for help with an issue, chances are we’ll ask you to turn on logging and we’ll also tell you which level would be appropriate.
Any time you turn on logging, it should be temporary, as logs can eat up disk space pretty quickly.
All Other Tabs
The other tabs may be ignored, unless you are feeling experimental, or you are using your Joomla installation for ecommerce. We’ll discuss them in detail in future issues of Joomla Tips. For now, here’s a short overview explaining the purpose of each tab.
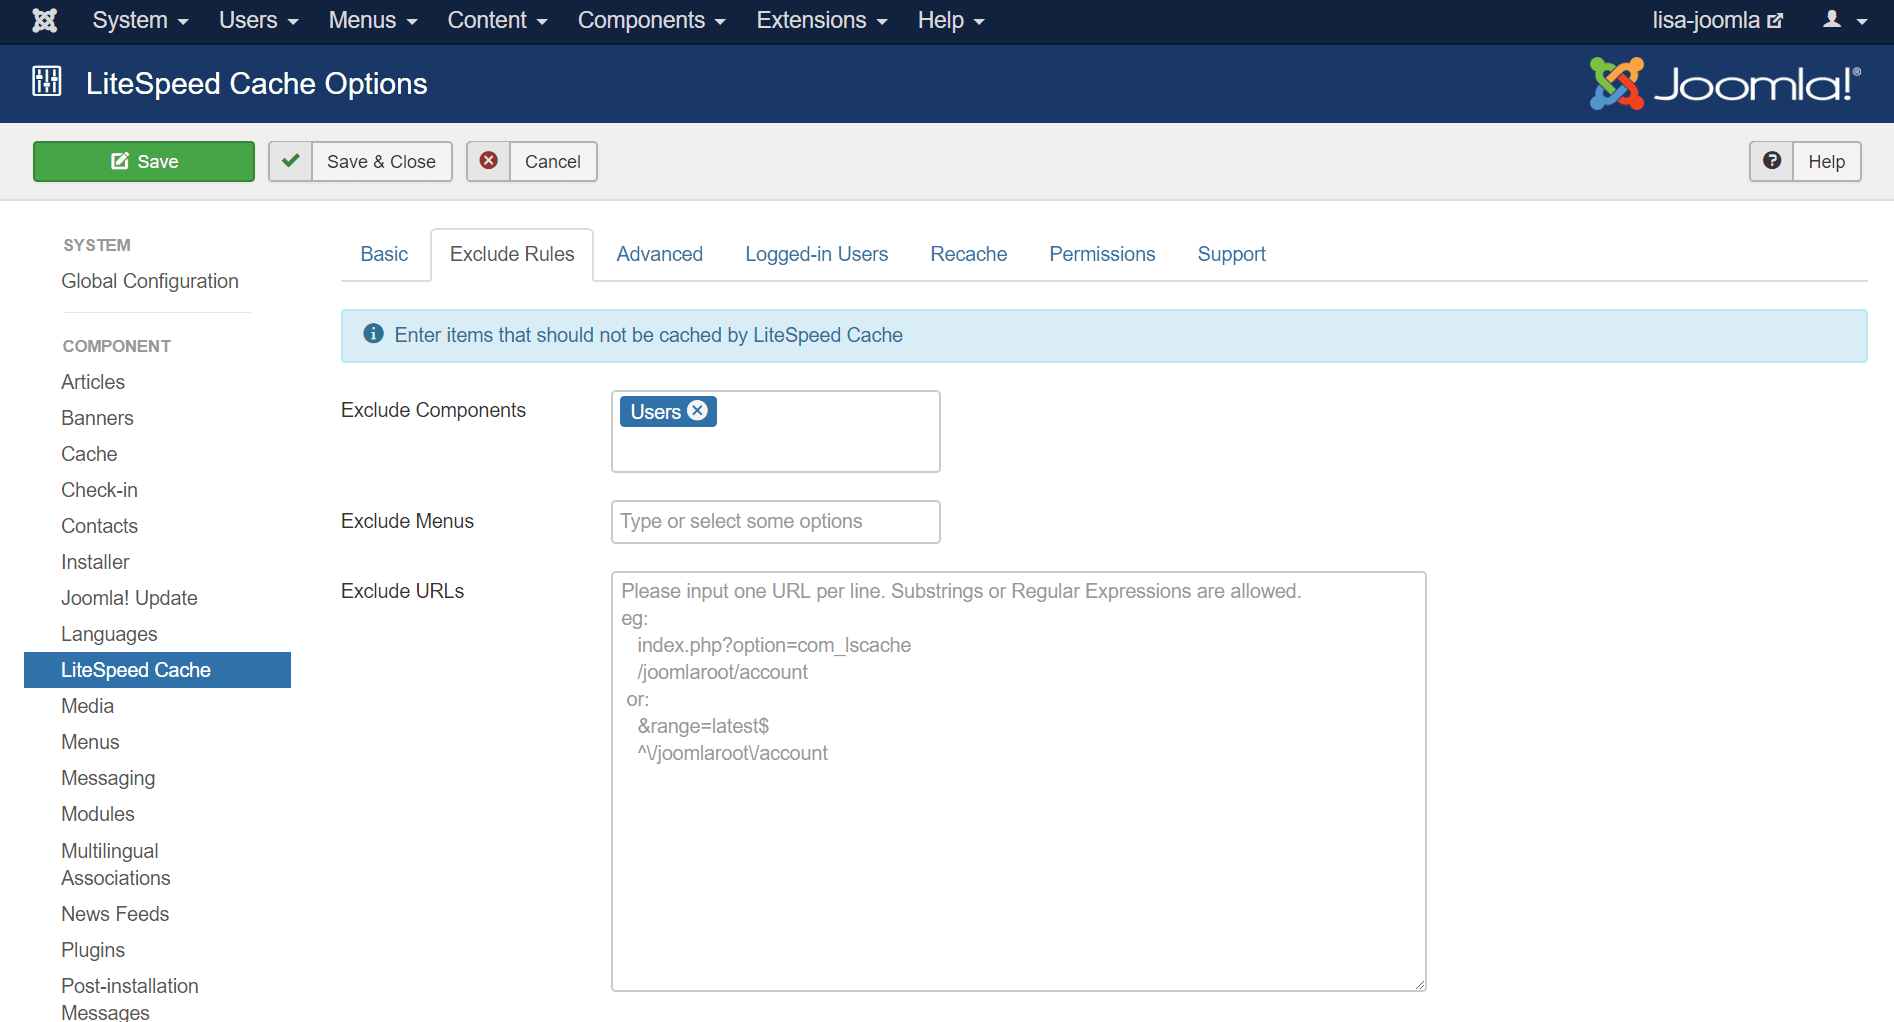
Exclude Rules
This tab allows you to specify Joomla components, menus, and URLs that should not be cached.
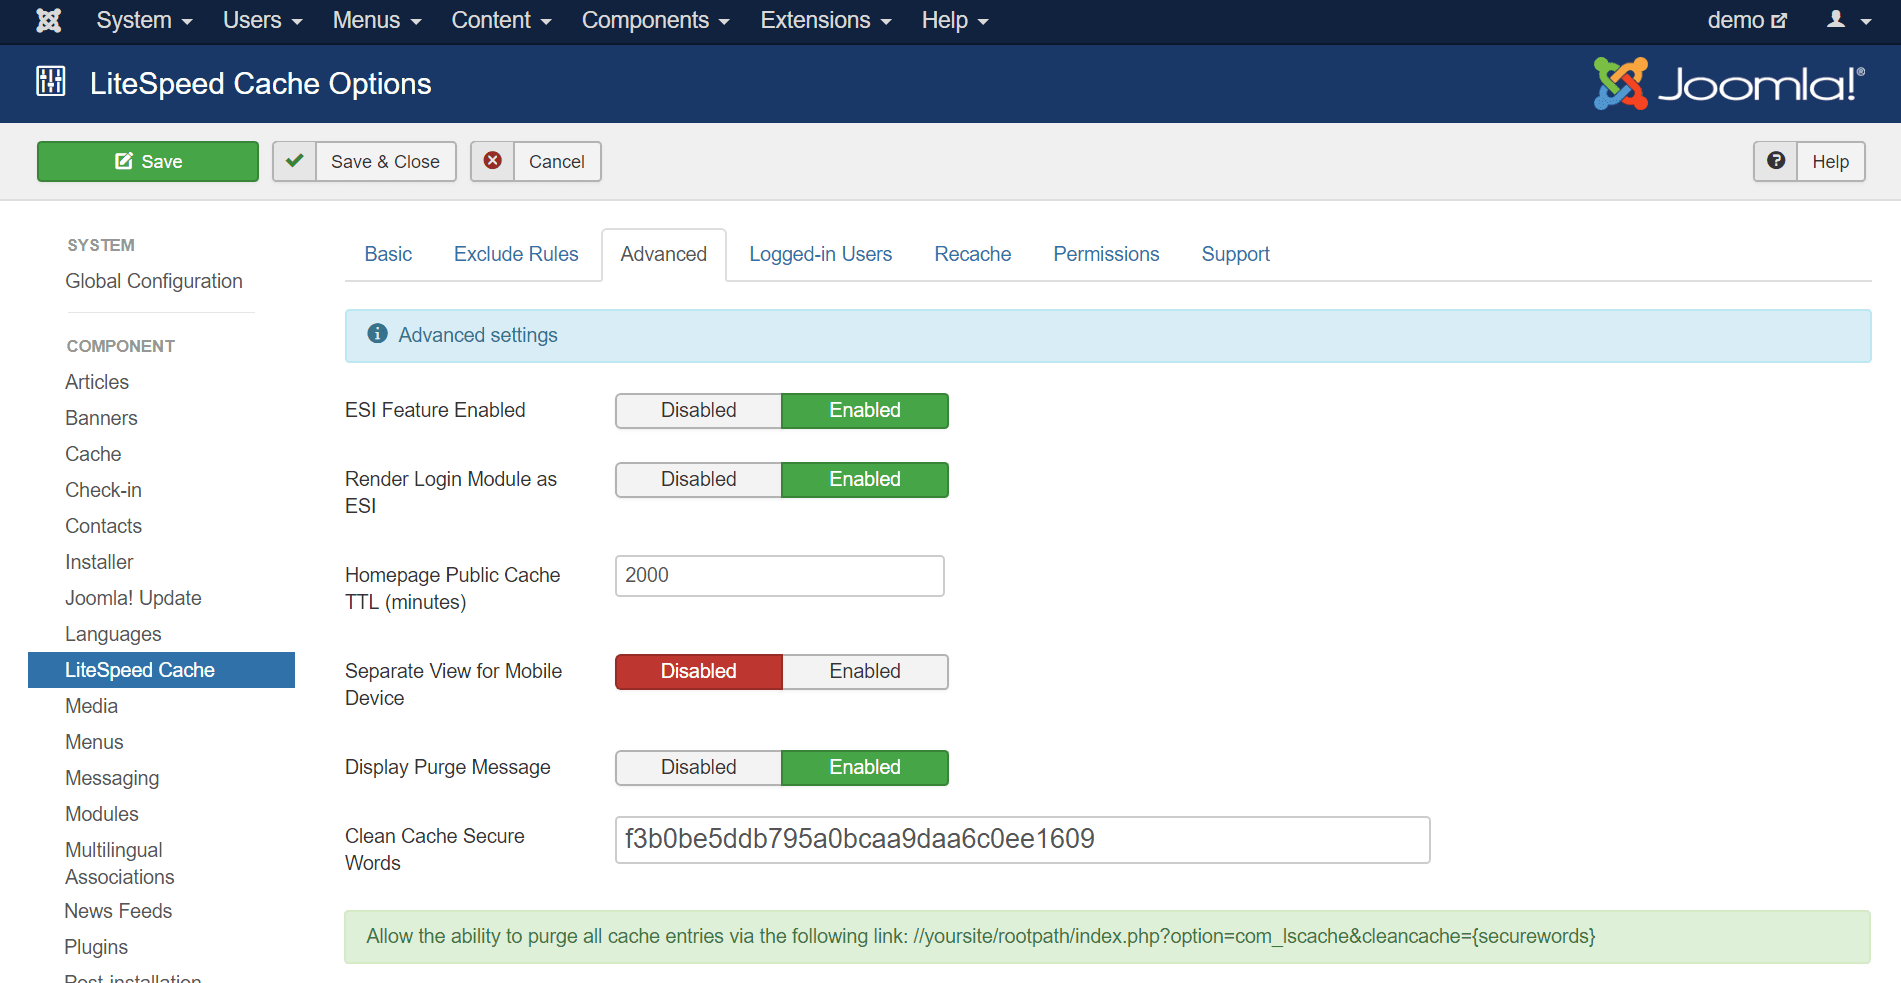
Advanced
You can set up ESI here (a must if you are trying to cache an ecommerce site), give yourself the ability to clear the cache from a secure link outside of Admin, set a different TTL for the homepage, and set up LSCache to save separate views for mobile and desktop.
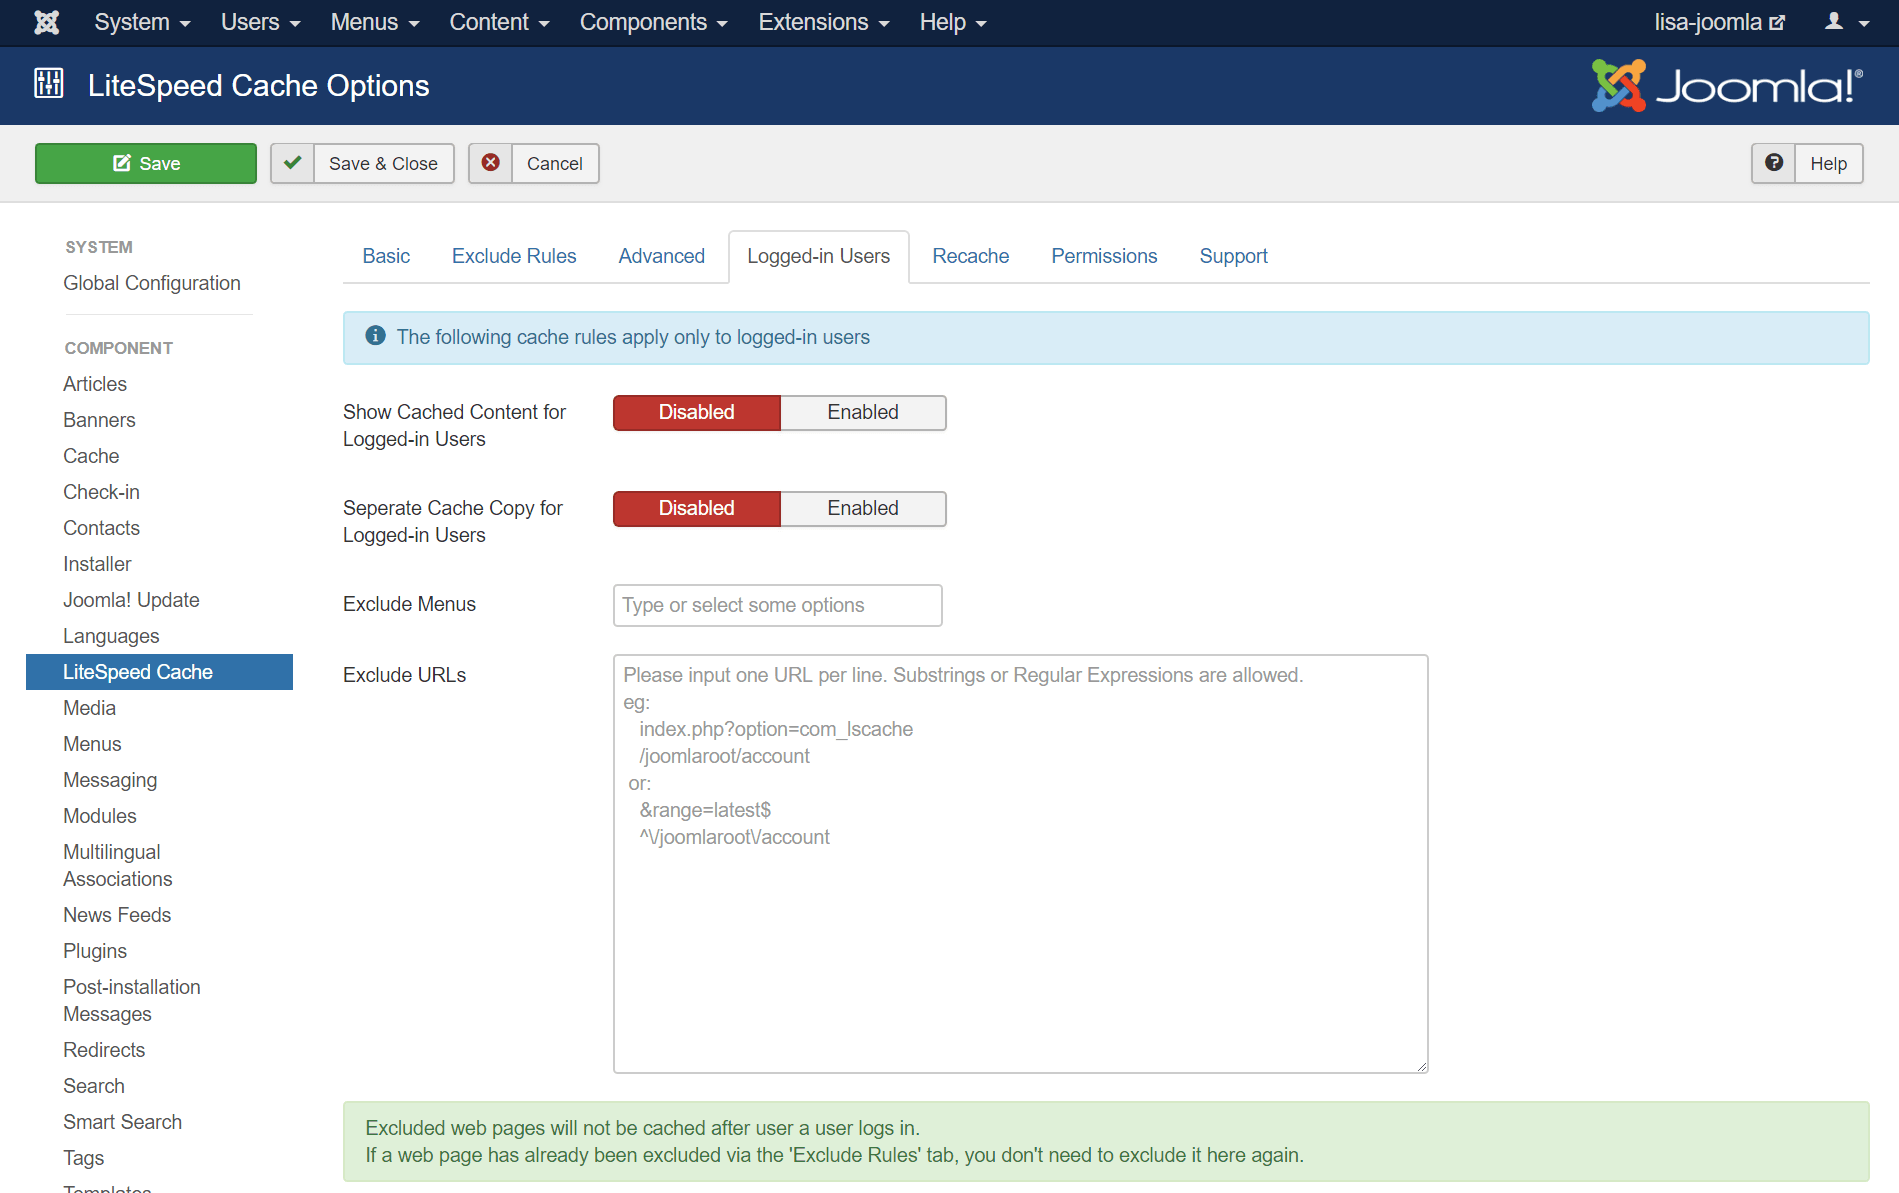
Logged-in Users
These settings pertain to caching for users who are logged in. By default caching for logged-in users is disabled.
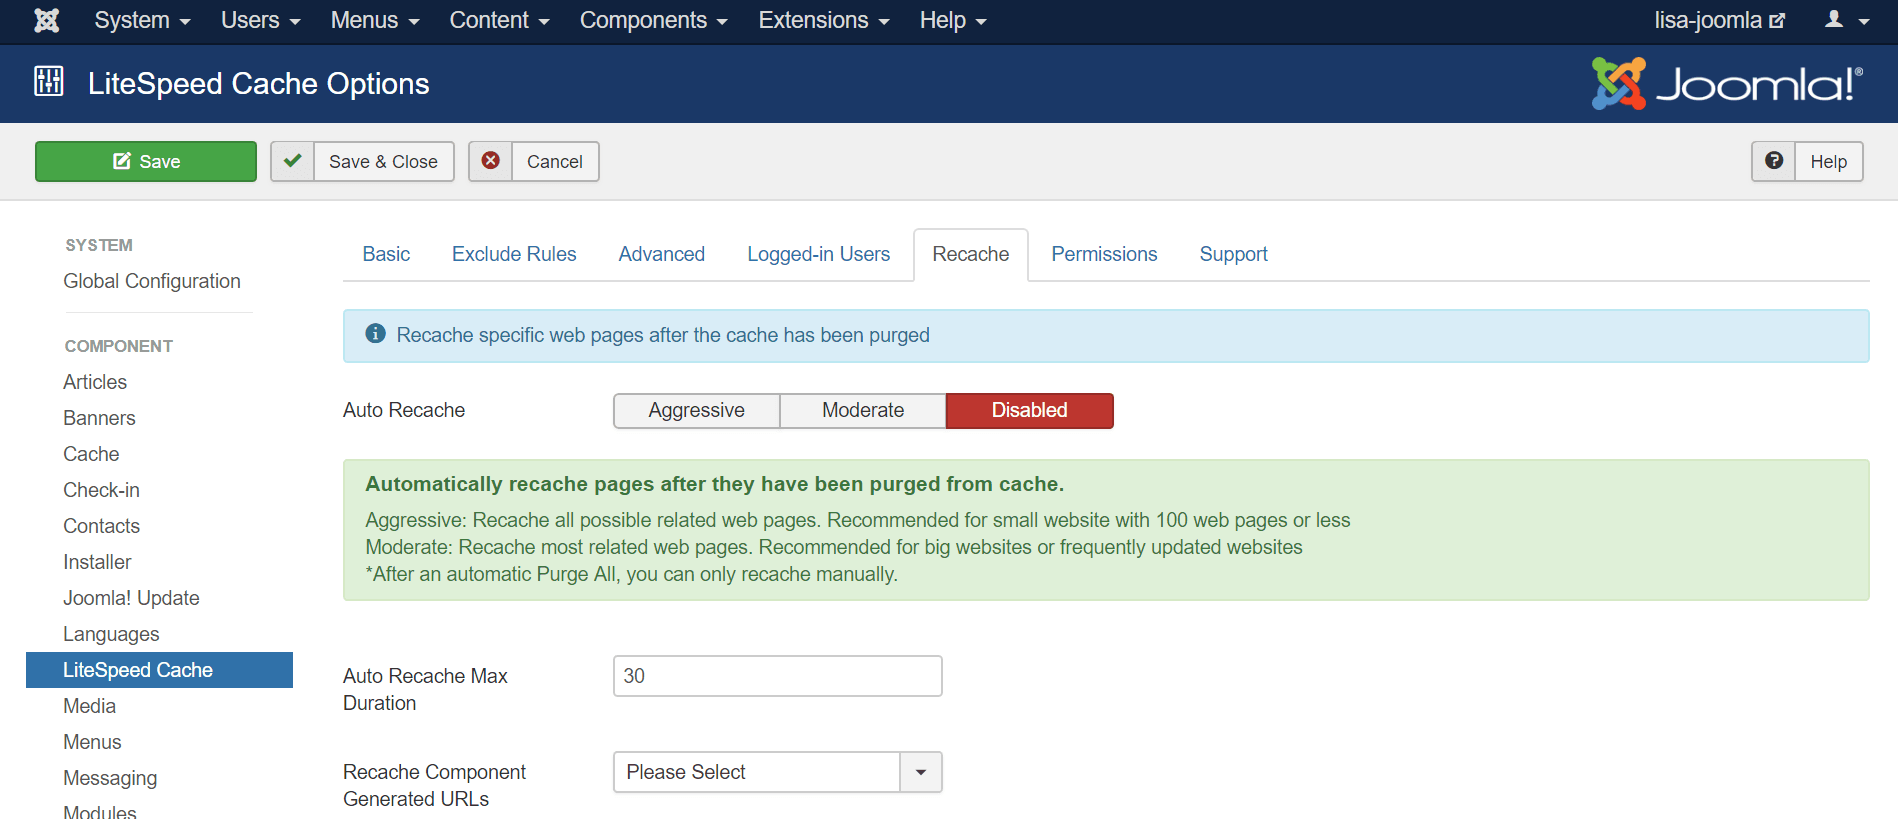
Recache
Usually, when a page is purged from the cache, it remains uncached until a visitor comes along and requests the page. With Auto Recache enabled, LiteSpeed will automatically re-cache those purged pages, which means that your site’s visitors will have a lower chance of ever encountering uncached content.
Permissions
This is your standard Joomla permissions page, and every setting defaults to Inherited.
Support
You can refer to this page if you need support. It includes some handy links.
Manual Purge
In a perfect world, you could enable caching and never look at the plugin again. In the real world, though, things happen, and you might need to manually purge the cache now and then. Here’s how:
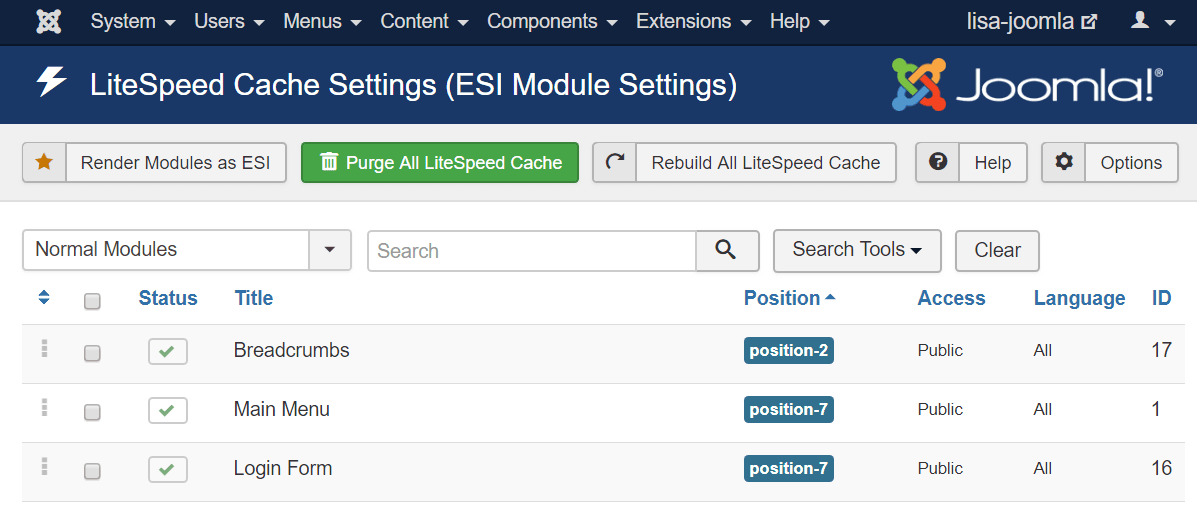
Navigate to Components > LiteSpeed Cache, and press the green Purge All LiteSpeed Cache button. All of the entries currently stored in the cache will be cleared.
If you want to re-populate the cache after that, you can do so via the Rebuild All LiteSpeed Cache button.
And that is all you need to know to use LSCache for Joomla successfully as a beginner! There may come a time when you would like to explore ESI, or Logged-in cache (both very powerful features, especially for ecommerce). We’ll be talking all about those options in a future Joomla Tips, so stay tuned!
—
Disclaimer: The information contained in this post is accurate for LSCJoomla v1.2.0. If you are using a newer version of the plugin, some details may have changed. Please refer to our wiki for the latest!
Have some of your own ideas for future Joomla Tips topics? Leave us a comment!
While you’re waiting for the next installment, here are a few things you can do:
- Subscribe to the Joomla Tips RSS feed
- Download LiteSpeed Cache for Joomla extension
- Learn more about the plugin on our website



Comments