LSCWP 5.0: Auto CDN Setup

Version 5.0 of the LiteSpeed Cache for WordPress plugin has arrived, and it provides a simple automated process to get you started with QUIC.cloud CDN!
Whether you prefer to stay in the driver’s seat and follow our existing manual onboarding procedure, or you’d like to let the plugin take the wheel, the end result is the same: your WordPress site powered by LiteSpeed Cache and QUIC.cloud CDN!
Please Note: As of March, 2025, and Version 7.0 of the LiteSpeed Cache plugin, the CDN setup process has been simplified and completely changed. As such, we’ve rewritten the instructions below to reflect the new way of getting started with QUIC.cloud CDN.
Enable QUIC.cloud services

We’re going to assume that this domain isn’t connected to QUIC.cloud yet, and that you are seeing an Enable QUIC.cloud services button. If this is not the case, and you have already connected your domain, you can skip a lot of what is in this blog post. You might prefer to check out the documentation, starting at the Enable QUIC.cloud CDN section.
Press the Enable QUIC.cloud services button. QUIC.cloud will attempt to detect your server type and IP. Wait a few moments for this to complete.
Create a QUIC.cloud Account
Next, you’ll be prompted to create a QUIC.cloud account to link to your WordPress site.
(If you already have a QUIC.cloud account for another domain, there is no need to create a new account. You can have multiple domains in your QUIC.cloud account. Log in to your existing account, and this domain will be added.)
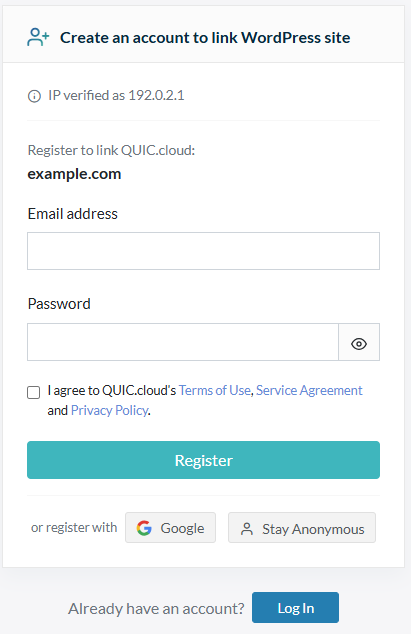
Enter your email address, choose a password, agree to the QUIC.cloud terms and conditions, and click Register. Check your email for a validation message from QUIC.cloud, and confirm your account by clicking the activation link within.
Your QUIC.cloud-WordPress connection is complete!
Set up the CDN
Next, you’ll be prompted to choose whether to enable the CDN or finish linking without the CDN.
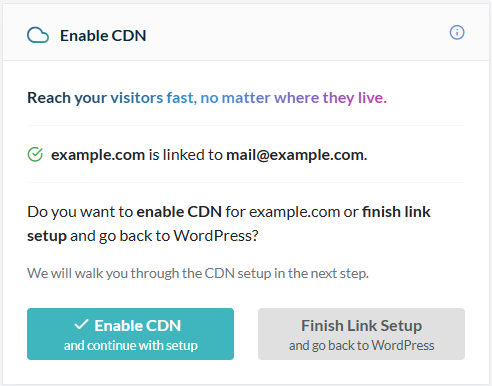
Click the Enable the CDN button.
Point your DNS to QUIC.cloud
If you plan to use QUIC.cloud CDN, you must point your domain’s DNS in our direction. You can either do this by updating CNAME records, or by switching to our own QUIC.cloud DNS service.
For the purposes of this blog post we are going to assume you wish to use QUIC.cloud DNS. If this is not the case, please see QUIC.cloud’s DNS documentation for other options.
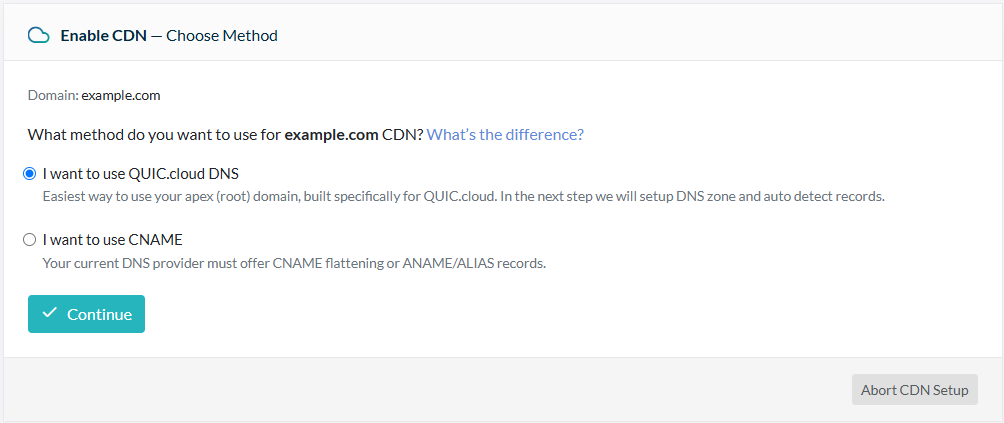
Select I want to use QUIC.cloud DNS and press Continue.
Import existing DNS records to QUIC.cloud
QUIC.cloud will attempt to detect your domain’s DNS records and import them. Please be patient while it works, and don’t close the window during this time.
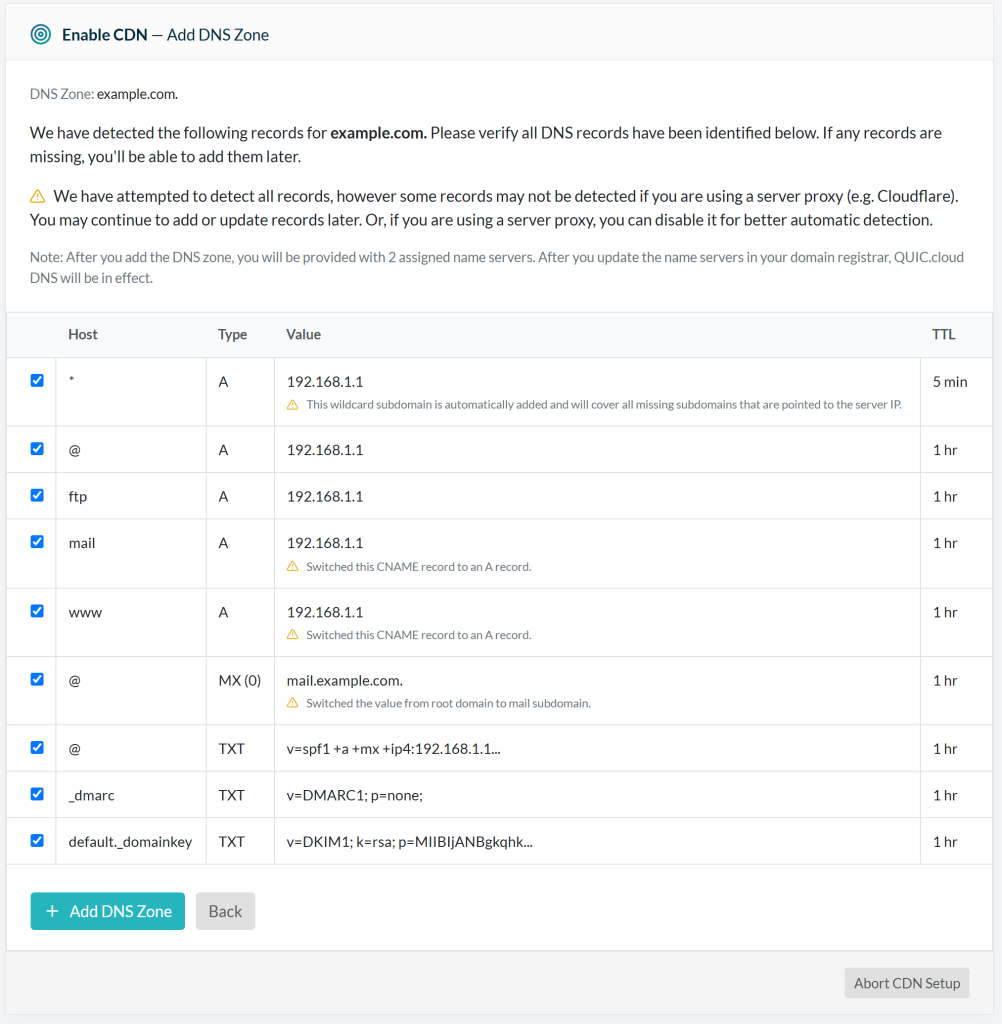
Once detection is complete, you will be asked to confirm that your DNS information is correct. Accept all of the detected records, or uncheck any that you no longer need, and click the Add DNS Zone button.
Update your nameservers
Once your DNS records have been imported into QUIC.cloud, you will need to instruct your domain registrar where to find your DNS records.
QUIC.cloud will attempt to verify that your nameservers are correctly set up at your domain registrar.
Your domain registrar is the provider you purchased your domain name from. Sometimes this is the same as your hosting provider, but that is not always the case. Make sure that you are in the right place before you change anything!
Log in to your domain registrar. Look for the area of their site which allows you to manage Nameservers. It may be called “DNS Zone” or “Manage DNS” or something similar. Your previous DNS provider’s nameservers should still be on file. You’ll see them listed under NS1, NS2, and possibly NS3 and NS4 as well.
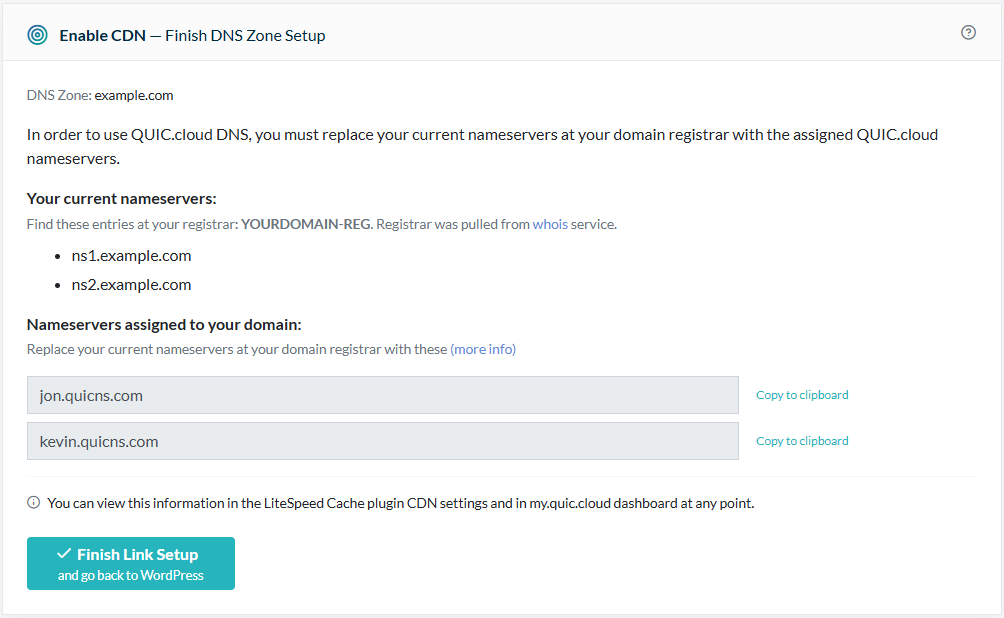
Change the NS1 and NS2 records, to match those displayed in the dialog box under Nameservers assigned to your domain. In this example, that would be jon.quicns.com and kevin.quicns.com. If your domain registrar has additional records (NS3, NS4, etc.) erase those values. You should now only have QUIC.cloud-provided NS records at your domain registrar.
Click the Finish Link Setup and go back to WordPress button.
Verify DNS
After the above steps are complete, you can check the status of your domain’s DNS with a tool like DNSChecker.org. There are typically delays due to DNS caching, but if your DNS has still not propagated after 24 hours, please open a support ticket and we’ll look into it.
Allowlist QUIC.cloud IPs
You’re almost finished! In order for QUIC.cloud to perform its services, it needs to be able to communicate with your origin server. Some server-level and application-level firewalls may interfere with this communication. If you have one of these firewalls in place, you will need to make sure it is allowing QUIC.cloud IP addresses.
Please see Adding QUIC.cloud IPs to Allowlist for more information.
All Done!
Congratulations! You are now using QUIC.cloud CDN!
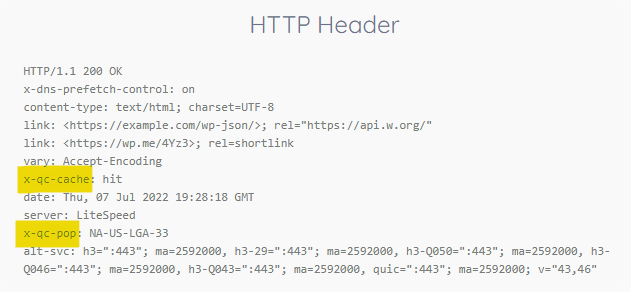
You can use the HTTP/3 Check tool to verify that your site is being served by QUIC.cloud and supports the latest cutting edge Internet protocols. Look for the x-qc-pop header to locate the QUIC.cloud node that served the request, and the x-qc-cache header to determine whether the page was cached at the node.
You can keep an eye on your bandwidth usage and tweak your CDN settings in your QUIC.cloud Dashboard.
—
This content was last verified and updated in April of 2025. If you find an inaccuracy, please let us know! In the meantime, see our documentation site for the most up-to-date information.
Comments