Install Sails.js on LiteSpeed Web Server
Sails.js is a realtime Model-View-Controller (MVC) framework for building Node.js applications. It is an open source framework that allows you to build JavaScript apps in a matter of weeks not months. And if paired with a LiteSpeed Web Server, it allows you to offer a high performance JS app that your users will love, by leveraging LiteSpeed’s caching and optimization features. As a developer, building on top of Sails means your app is written entirely in JavaScript, and there is no overhead of having to deal with multiple programming languages to deliver a great user experience. Let’s look at how to install Sails.js on LiteSpeed Web Server.
Please note this tutorial does not work with control panel installations, nor does it work with OpenLiteSpeed.
Here is what you will need to complete this setup:
- Native LiteSpeed Web Server with a valid license key or trial license running on a VPS, or the AWS LiteSpeed Web Server instance deployed via these instructions.
- Node.js and npm package manager
- The Sails.js package for Linux distribution
Install the Sails.js framework
Install Node.js
Before you install Sails.js, Node.js must be installed on the server. Run the following commands to install dependencies, add the Node.js repository to your server, and install Node.js:
apt-get install curl wget gnupg2 -y
curl -sL https://deb.nodesource.com/setup_14.x | bash -
apt-get install nodejs -y
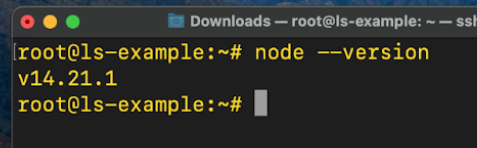
Check and verify the version of Node.js that is now running on your server by running the command:
node --version
Install Sails.js
Sails.js can be easily installed using the npm package manager for JavaScript. Run the following command to kick start the install:
npm -g install sails
Once the installation is complete, you can simply create a project folder by running the command:
mkdir newproject
This will create a new directory named newproject
You now need to change into the directory and create a new Sails app. Run the following commands to do this:
cd newproject
sails new softwareproject
You will be asked to choose a template for your Sails application:

Type 2 and press Enter to start the Sails.js app installation process. Sails.js will now start to download dependencies and software components needed by your app.
Once the Sails.js installation process is complete, an application directory will be created. The directory is given the name of the app that you specified in the sails new command. In this example, it’s softwareproject. Run the following commands to start the Sails application:
cd softwareproject
sails lift
You should see the following output:
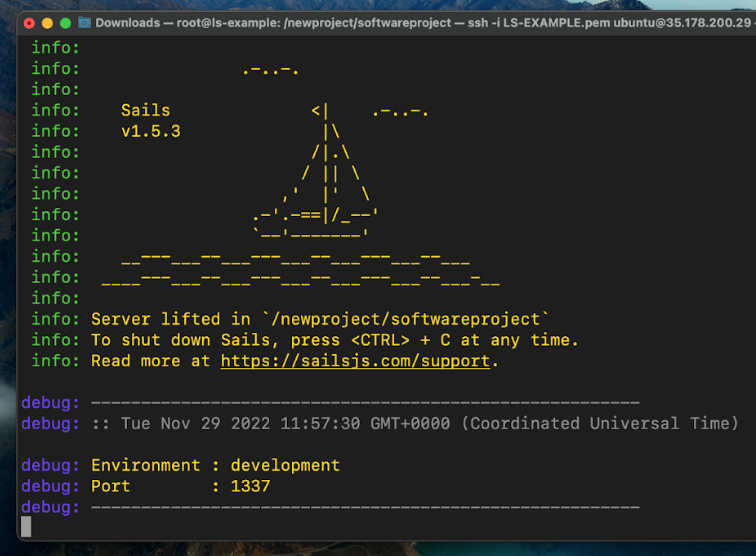
Sails v1.5.3
Server lifted in ‘/newproject/softwareproject’
To shut down sails, press <CTRL> + C at any time.
Read more at https://sailsjs.com/support
Environment: development
Port: 1337
Create a Systemd service file for the Sails.js app that you have created
You now need to create a systemd configuration file that will help you to manage your Sails.js application. The systemd file will help to ensure that the Sails.js app can start up automatically at system reboot. You can start, stop, and restart the Sails.js app using systemctl.
Run the following command to create the service file:
nano /lib/systemd/system/sails.service
Add the following configuration into this file:
[Unit]
After=network.target
[Service]
Type=simple
User=root
WorkingDirectory=/newproject/softwareproject
ExecStart=/usr/bin/sails lift
Restart=on-failure
[Install]
WantedBy=multi-user.target
Save and close the file then reload the systemd daemon to apply the changes:
systemctl daemon-reload
You can now start the Sails.js service and enable it to start at system reboot:
systemctl start sails
systemctl enable sails
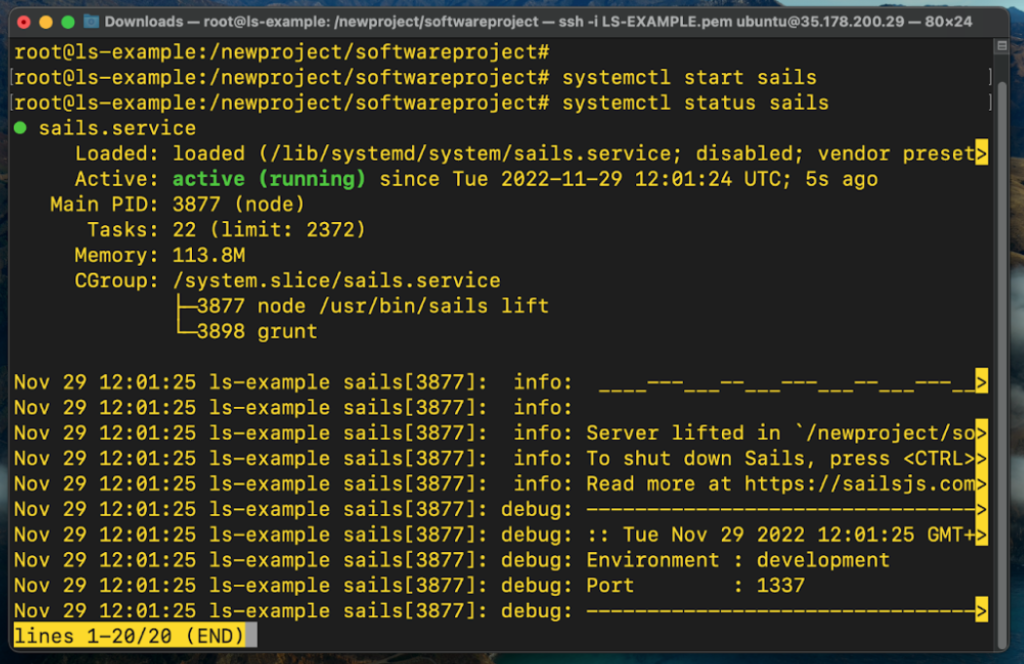
If you have configured everything correctly, run the following command to check the status of the Sails.js service:
systemctl status sails
It should show that the service is active (running) as shown in the output below:
Configure LitesSpeed Web Server as a reverse proxy for Sails.js
The final step is to configure LiteSpeed Web Server as a reverse proxy for Sails.js. A reverse proxy is a server that sits in front of a web server and forwards client requests to that web server. LiteSpeed Web Server can also be implemented as a reverse proxy server for websites and web applications to help increase security, performance, and reliability.
Open a new browser window and type in the following URL to log into the WebAdmin Console:
https://YOUR_IP_OR_HOSTNAME:7080
On the login page, type in your WebAdmin Console password, navigate to Configuration > Virtual Hosts, and click Add.
Set the following values (being sure to replace yourdomain with your actual domain name) and click Save:
- Virtual Host Name:
yourdomain.com - Virtual Host Root:
$SERVER_ROOT/yourdomain/ - Config File:
$SERVER_ROOT/conf/vhosts/yourdomain.xml
Click on the newly created virtual host, click View/Edit, navigate to General > General, and click Edit. Set the following values and click Save:
- Document Root:
$VH_ROOT/html - Enable Compression:
Yes
In the Index Files section, click Edit. Set the following values and click Save:
- Use Server Index Files:
No - Index Files:
index.html, index.php - Auto Index:
No
Navigate to External App and click Add. Set Type to Web Server and click Next. Set the following values and click Save:
- Name:
SAILSJS - Address:
http://127.0.0.1:1337
Navigate to Context and click Add. Set Type to Proxy and click Next. Set the following values and click Save:
- URI:
/ - Web Server:
[VHost level] SAILSJS
To put everything into action, navigate to Configuration > Listeners > Virtual Host Mappings, and click Add. Select the virtual host that you created, set Domains to your domain name, and click Save.
Click the Grateful Restart link at the top of the WebAdmin Console to apply the above changes.
Test the access to the Sails.js web application
Open a new browser window and type in your domain name. You should see the default Sails.js page as shown in the image below:

And that’s it! You have successfully installed the Sails.js framework on a LiteSpeed Enterprise Web Server. From here you can now start building amazing and fast web JavaScript applications for your users. For more technical support details please visit our LiteSpeed Web Server documentation.
Comments